
Configure Google Single Sign-On (SSO)
Overview
ValueCore integrates with single sign-on (SSO) to streamline user authentication and improve workflow efficiency. This guide walks you through integrating ValueCore with Google Workspace (Google SSO) using SAML 2.0.
If you need help or have questions, please contact support@valuecore.ai
Note:
- You must be an Organization Owner in ValueCore.
- You must have a Google Workspace admin account with permission to manage apps and SSO settings.
Step-by-Step Guide
Step 1: Access SSO Settings in ValueCore
- Log in to ValueCore.
- Navigate to Manage Organization.
- Click Advanced Settings.

- Select the SSO Settings tab.

- Click Add SAML Configuration.

Keep this page open, you’ll need values from it later
Step 2: Create a SAML App in Google Admin Console
- Log in to the Google Admin Console as an administrator.
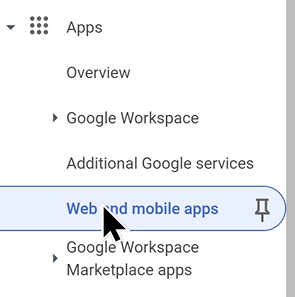
- Go to Apps → Web and mobile apps.
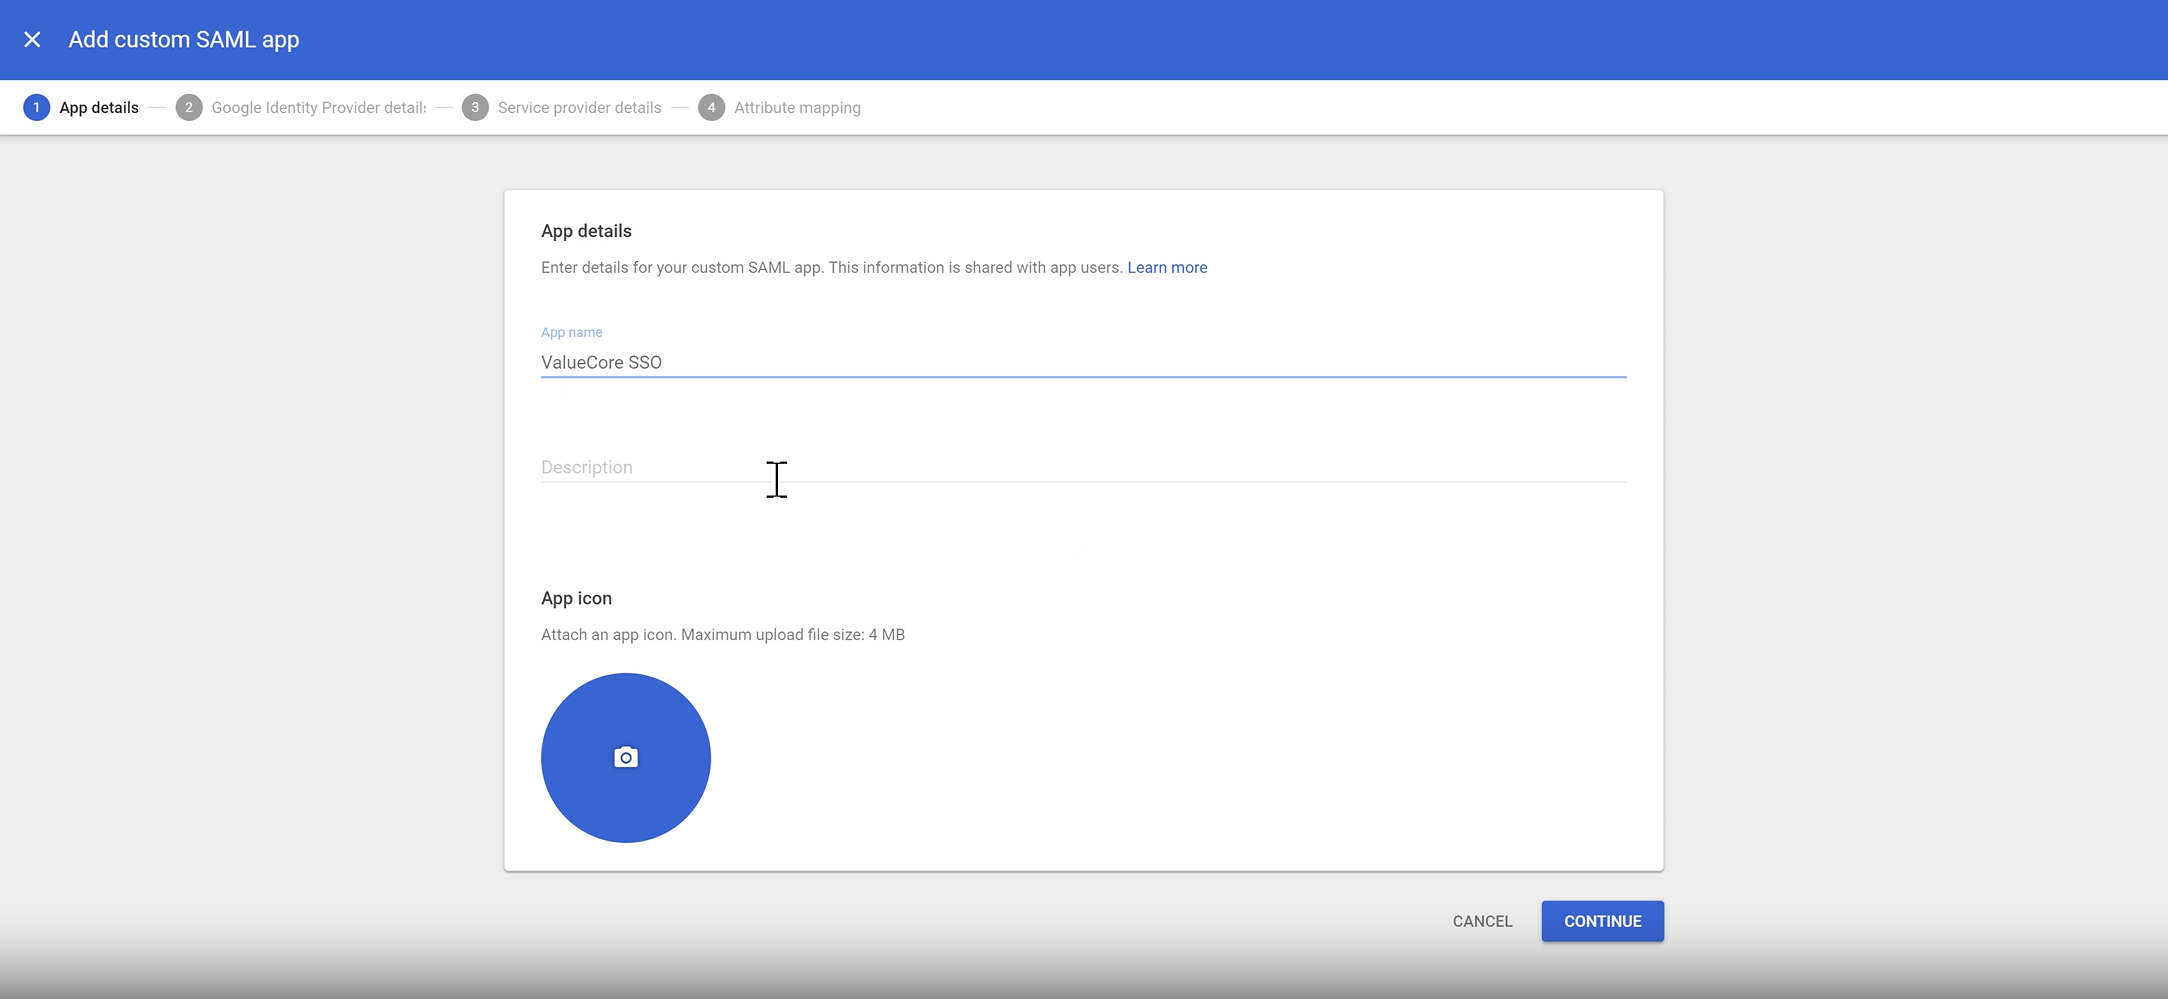
- Click Add app → Add custom SAML app.
- Enter an App name (for example, ValueCore) and click Continue.
Step 3: Get Google IdP Details
On the Google Identity Provider details page:
-
Download the Certificate.
Copy the following values (you’ll use them in ValueCore):
- SSO URL
- Entity ID
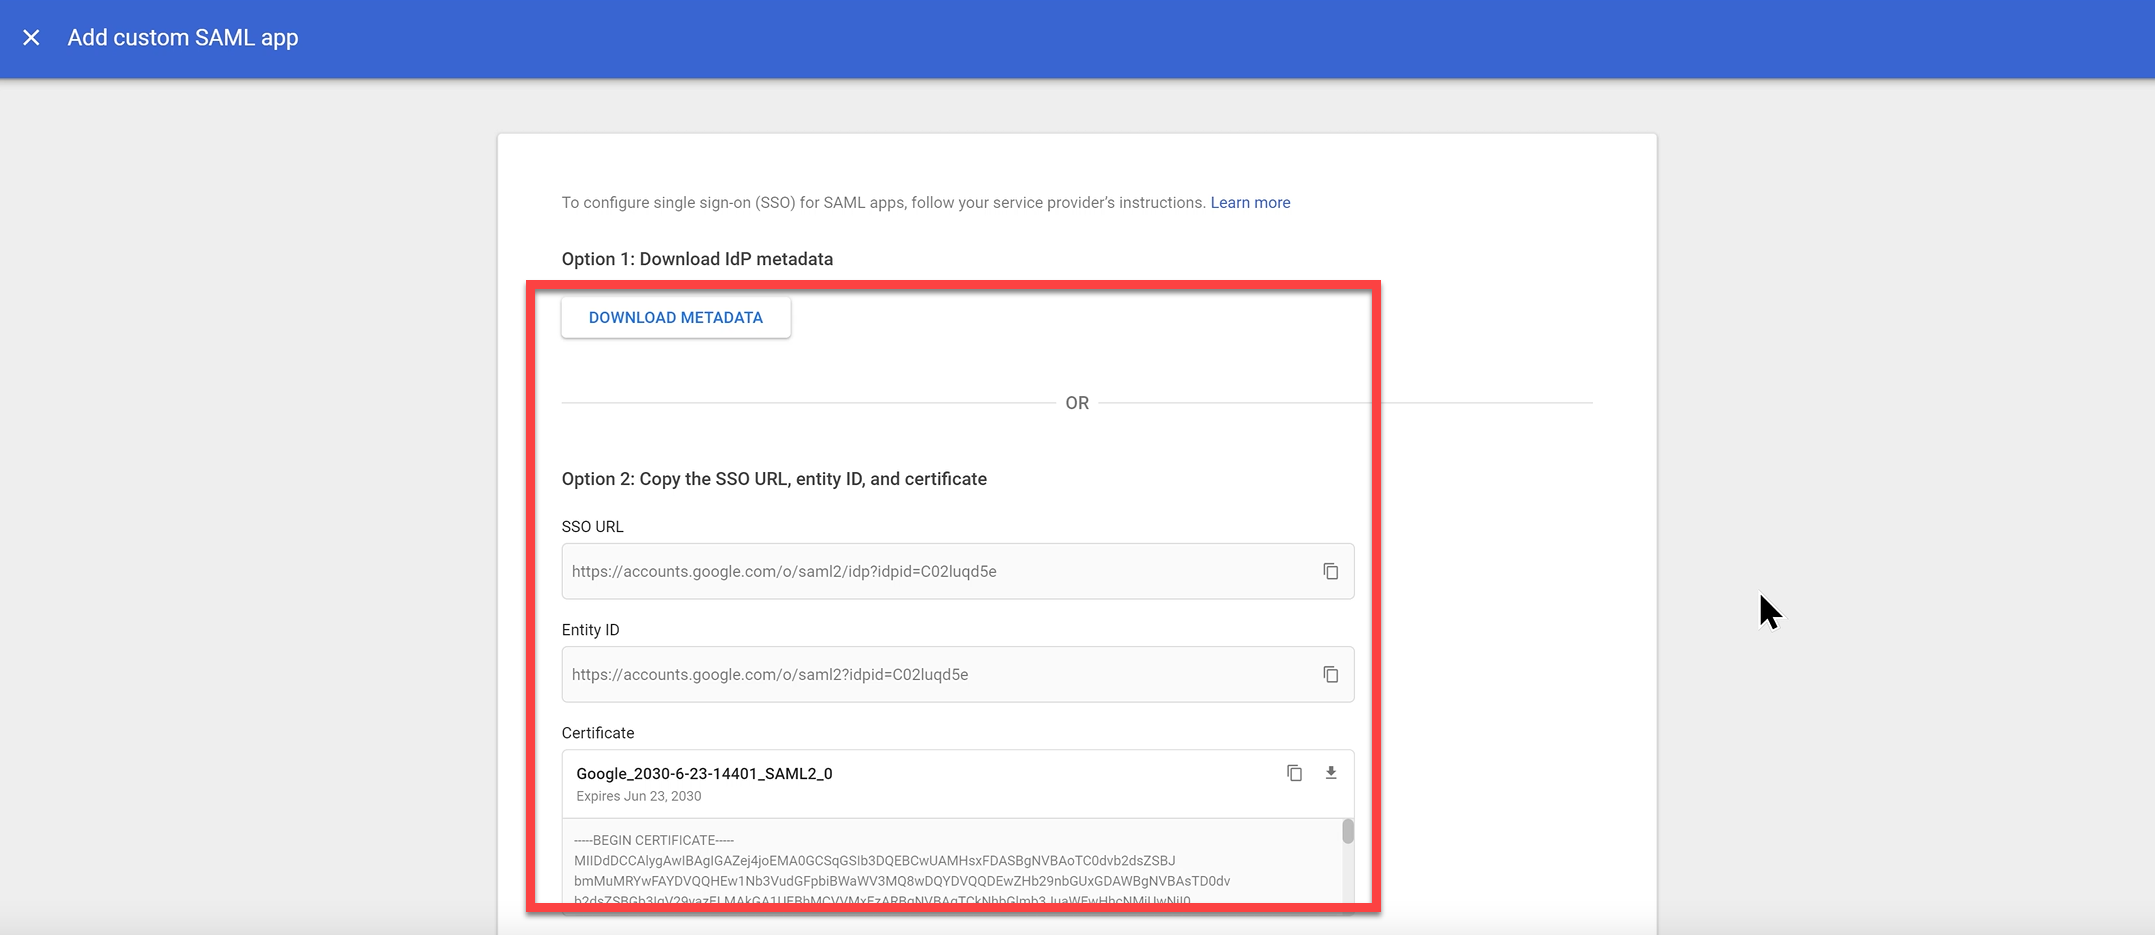
Click Continue.
Step 4: Configure Service Provider Details in Google
On the Service provider details page:
- From the ValueCore SSO Settings screen, copy:
- SP MetaData URL
- SP Assertion URL

- Paste them into Google:
- ValueCore SP MetaData URL → Entity ID
- ValueCore SP Assertion URL → ACS URL
- Start URL:
https://visualize-roi.com/vr/api/saml/login
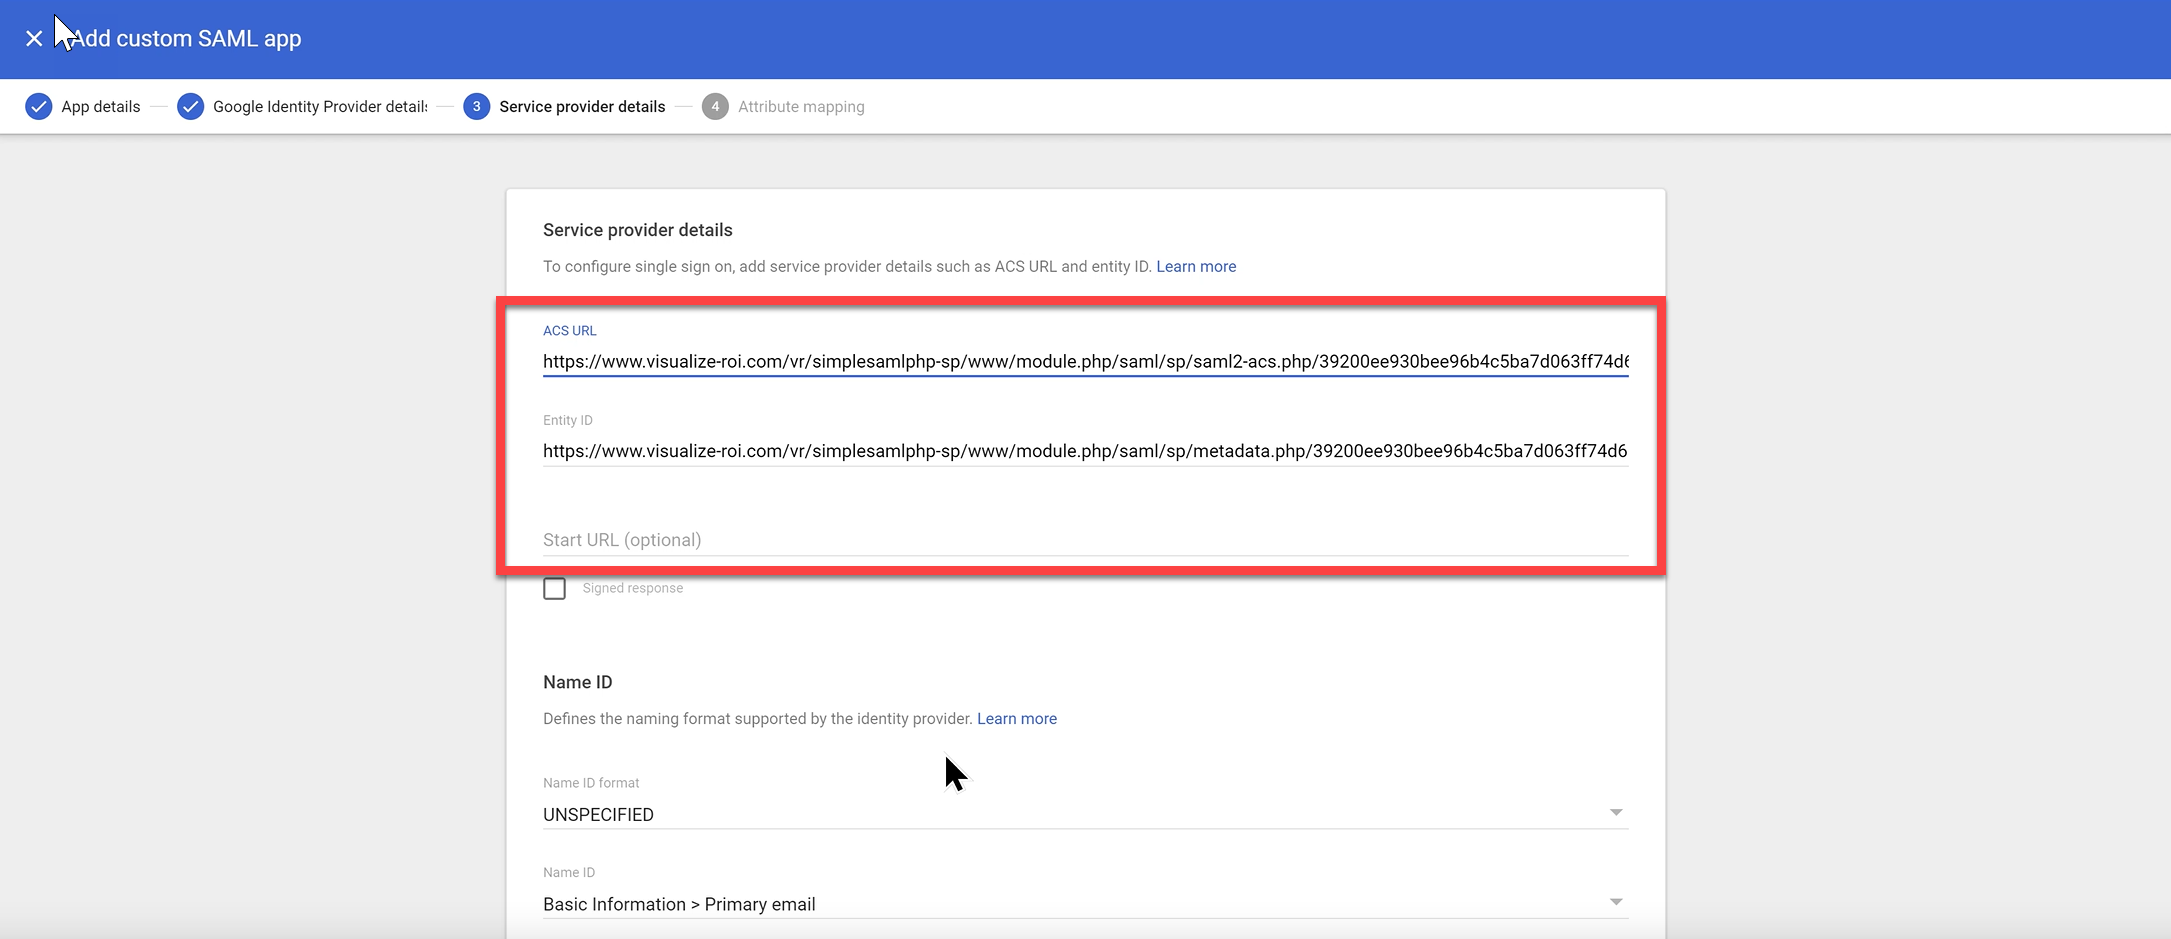
Click Continue.
Step 5: Configure Attribute Mapping
-
On the Attribute mapping screen, click Add mapping.
Map:
- Google Directory attributes:
Primary email→emailFirst name→first_nameLast name→last_name
- Google Directory attributes:
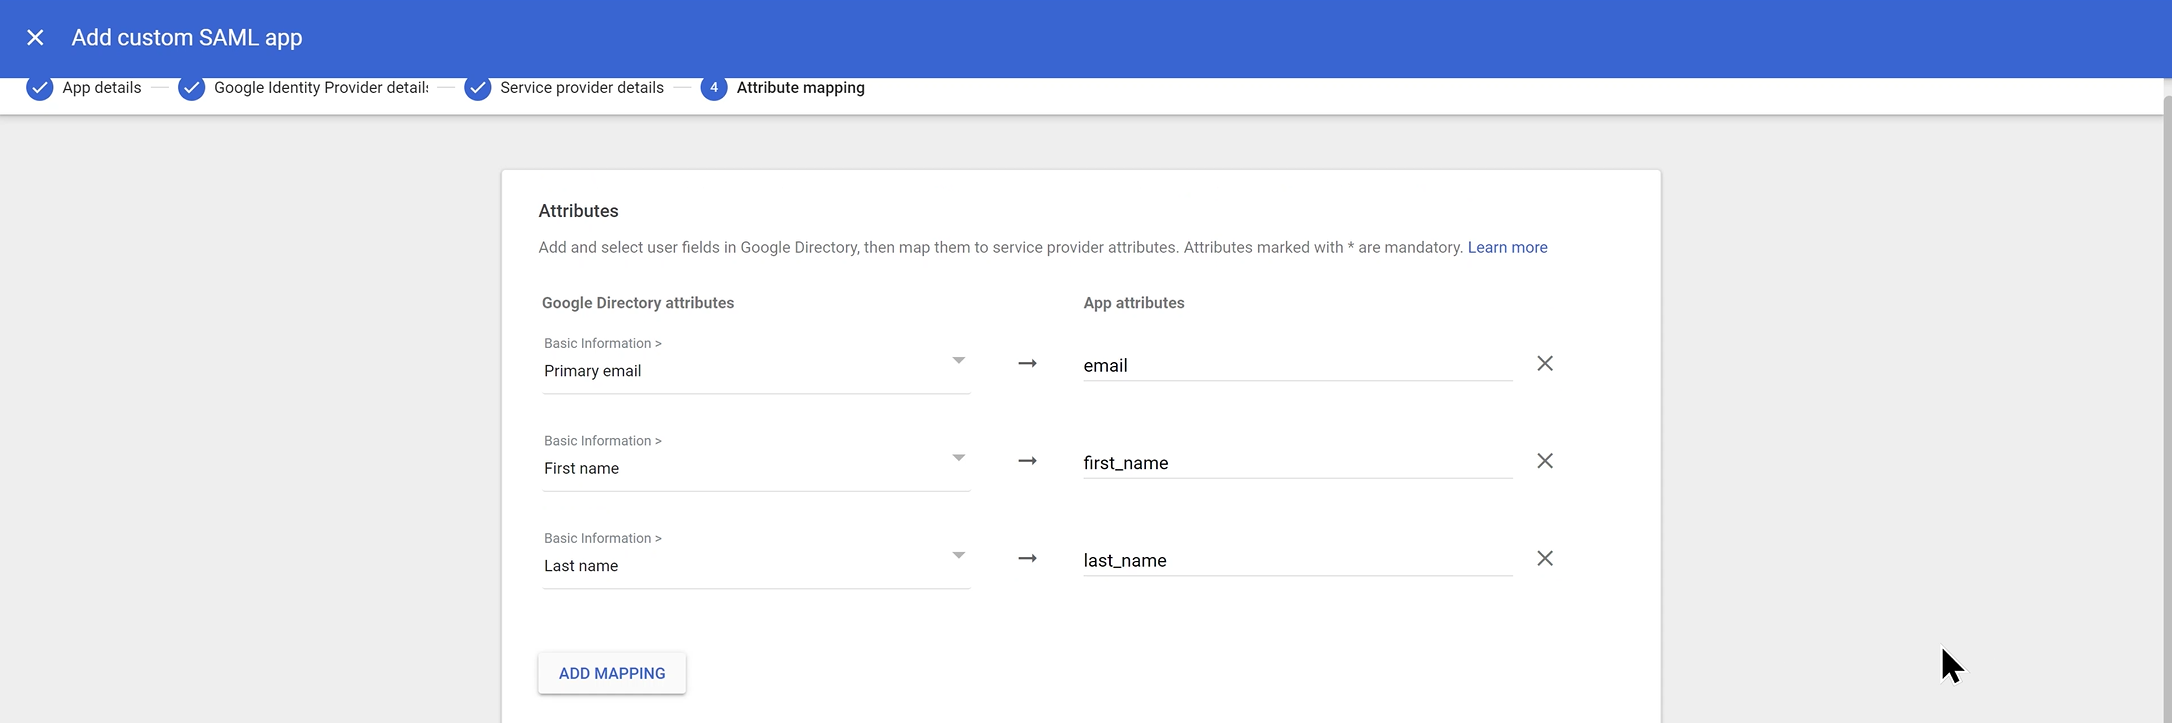
Click Finish.
Step 6: Enable the App for Users
- After the app is created, open the ValueCore SAML app in Google Admin.
- Set User access to ON for the appropriate organizational units.
Step 7: Enter Google IdP Details in ValueCore
- Return to the ValueCore SSO Settings page.
- Click Enter IDP Details.

Fill in the following fields:
- Connection Name
- Example:
Google SSO - Paste the Google Entity ID → Entity ID
- Paste the Google SSO URL → SingleSignOnService URL
- Example:
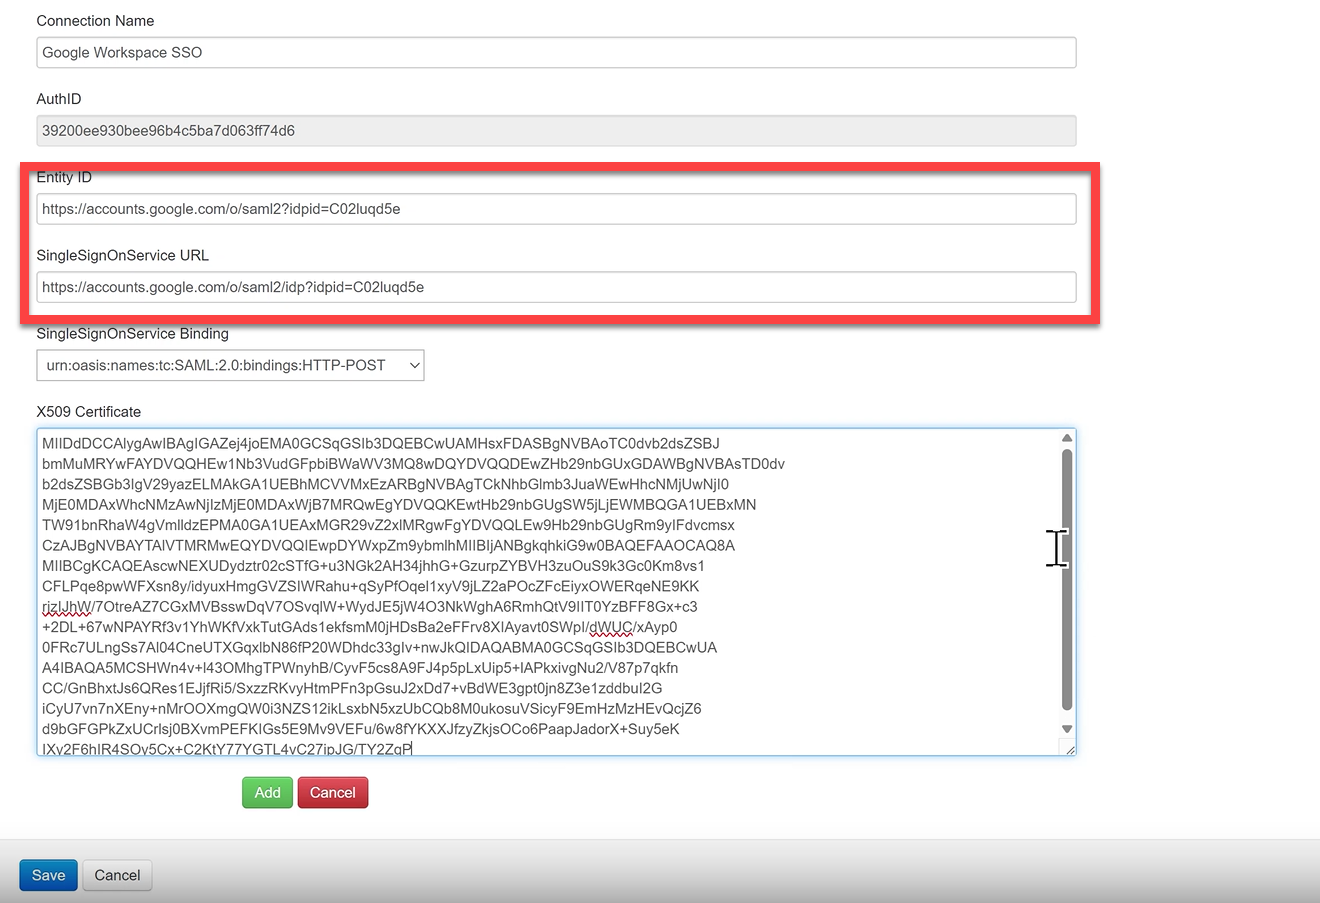
- Open the downloaded Google certificate in Notepad.
- Copy only the text between:
-----BEGIN CERTIFICATE----- -----END CERTIFICATE-----
- Paste this text into the X509 Certificate field.
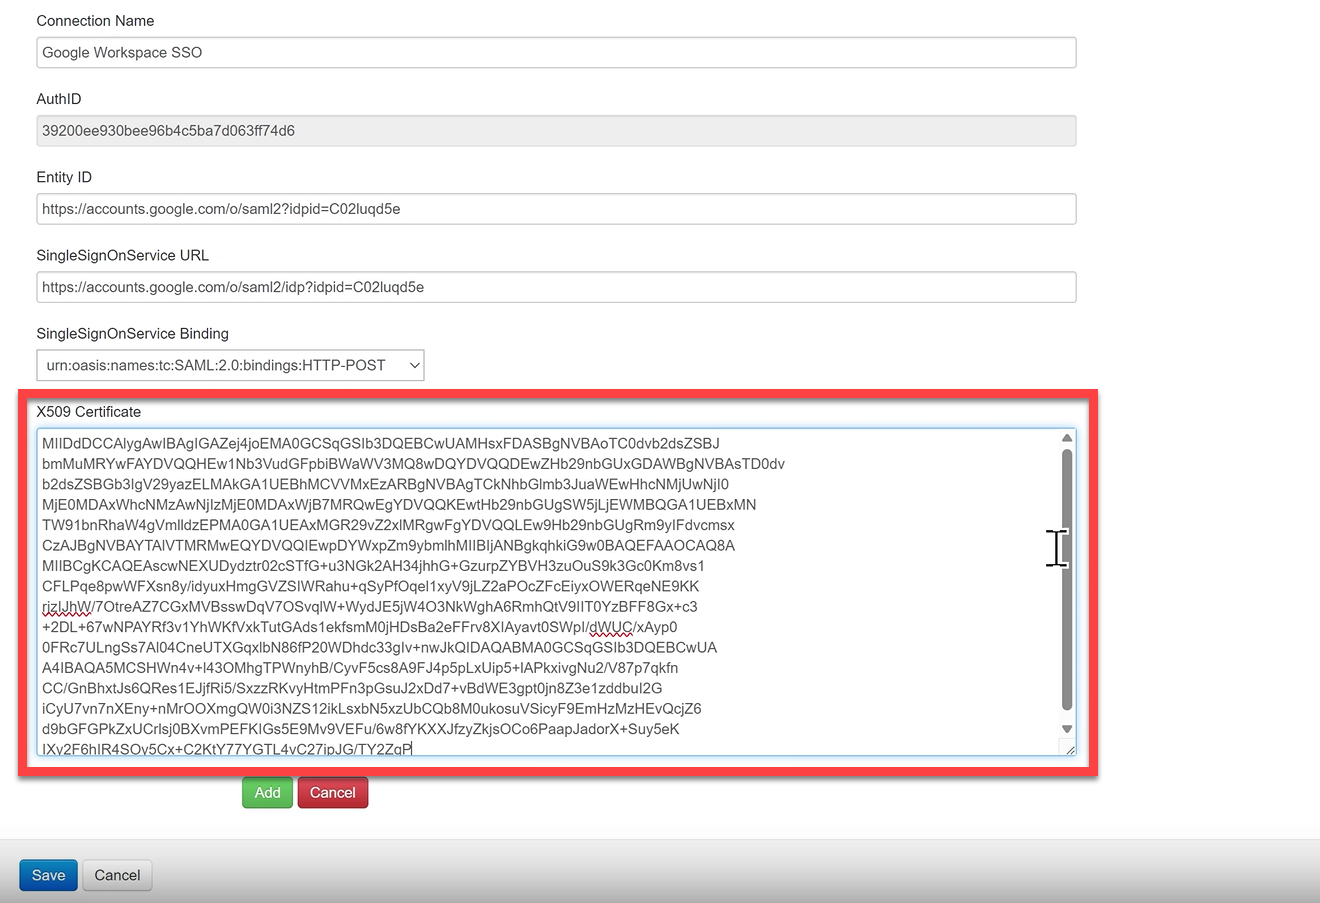
Click Add.
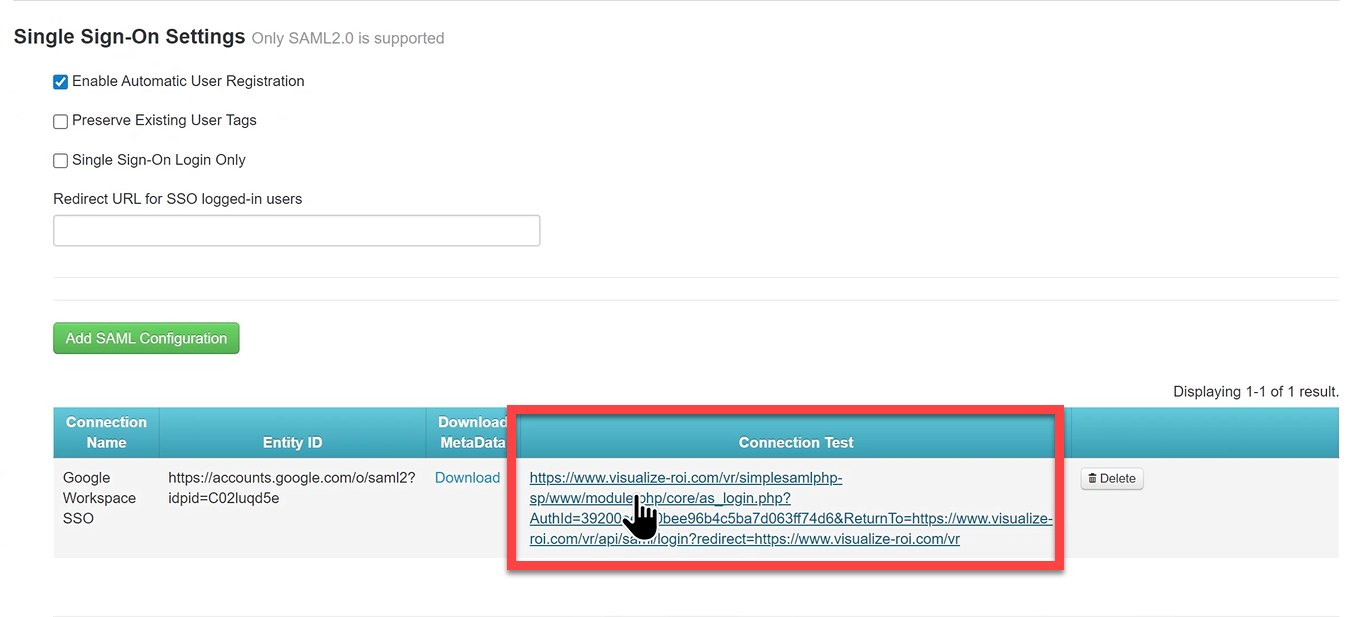
Step 8: Test the Google SSO Integration
After saving the SAML configuration, verify that Google SSO is working correctly before enabling it broadly.
Option A: Test from ValueCore (Recommended for Admins)
In the Connection Test column, click the test URL.
Option B: Test from Google Workspace (End-User Experience)
- Open a new incognito/private browser window.
- Go to https://google.com and sign in as a Google Workspace user.
- Click the Google App Launcher (9-dot grid) in the top-right corner.
- Select the ValueCore SSO application.
- You should be redirected automatically into ValueCore without entering a password.
This confirms the IdP-initiated login flow works as expected.
Troubleshooting Tips (If Login Fails)
- Ensure the user is assigned to the ValueCore SAML app in Google Admin.
- Confirm the Primary email attribute is mapped to
email. - Verify the certificate pasted into ValueCore has no extra spaces or line breaks.
- Make sure the SAML configuration is enabled and saved in ValueCore.
- Re-test using an incognito window to avoid cached sessions.